what grit is recommended to remove rust in your trunk of your car
i / eight
How to prepare rust on a auto: Step-by-stride instructions for motorcar rust repair
Certain, yous can lower your risk of rust and rust spots on your car by applying paint protection film to chip-prone areas similar the front edge of the hood, and by oft washing off road table salt and waxing your vehicle regularly. But fifty-fifty and so, you're still going to get rust spots.
Car rust repair isn't hard, but it is time-consuming (more often than not waiting for primer and paint to dry between steps). Plan to spend about $100 on supplies like sandpaper, primer, masking tape and poly sheeting, a tack rag, polishing compound, affect-up paint and articulate coat. Choose a calm, overcast mean solar day and cake out the total solar day to fix the most common rust spots on the hood and doors.
Y'all tin can buy automotive touch-upward pigment in pints and quarts to use in a spray gun, in aerosol cans, or in roller brawl applicators. Fifty-fifty if yous know how to use a spray gun, mixing automotive paint with a reducer to match the temperature and humidity conditions can be mighty tricky. We don't recommend it. Instead, buy aerosol cans for larger repairs and roller ball applicators to prepare scratches.
In order to purchase the perfect color match for your vehicle's factory paint, you'll first demand to find the car manufacturer's paint code. It can be in a variety of places on the body, in the engine compartment or trunk, or other places. Apply either of these online resources to find instructions on how to locate your paint code: automotivetouchup.com or duplicolor.com .
Most tardily-model vehicles were painted with base of operations coat/clear coat paint. The base of operations coat contains but the pigment and binding resins-the articulate coat is merely the gloss. You'll need equal amounts of both. You'll also demand an epoxy self-etching primer to bite into the blank metal and a lacquer primer to agree the paint. We used paint, primer and sanding supplies from automotivetouchup.com for this repair. The Dupli-Color brand is available at almost retail auto parts stores, car dealers and online retailers. Or, yous can buy automotive paint locally from a professional auto body supplier.
Next, buy 40-, 600- and 1,000-dust sandpaper, a sanding block, grease and wax remover, poly sheeting, painter'south tape, a tack rag and a microfibre cloth.
2 / 8
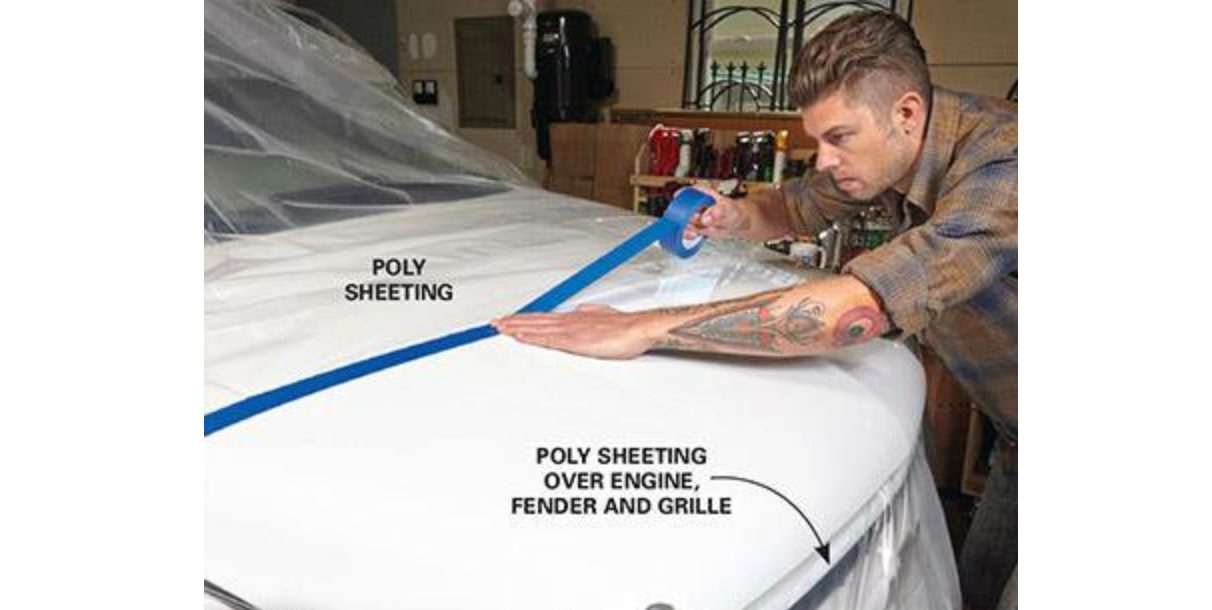
Pace 1: Mask off the car rust repair area
Protect the entire vehicle from paint overspray with poly sheeting. If you lot're painting the hood, spread poly sheeting over the engine and fenders. In door areas, cut poly sheeting to fit the door opening and tape it to the jamb. The terminal masking must be a foot or two away from the repair expanse then y'all'll have room toblend the touch-up pigment into the skilful areas.
Got a chip instead of full-blown rust? Check out this expert advice on how to gear up paint chips.
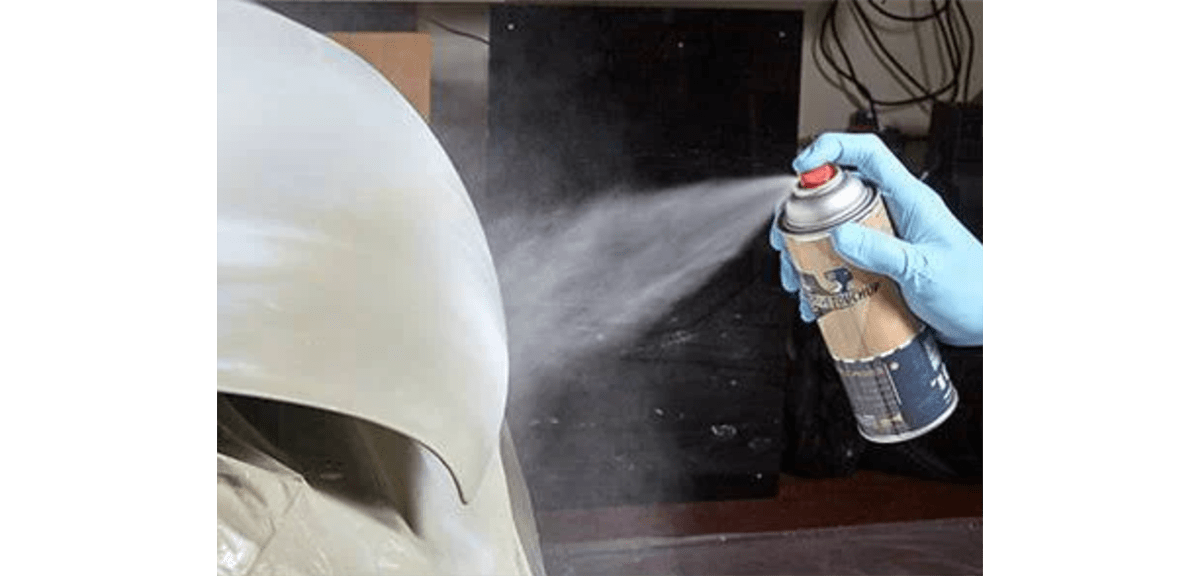
3 / 8
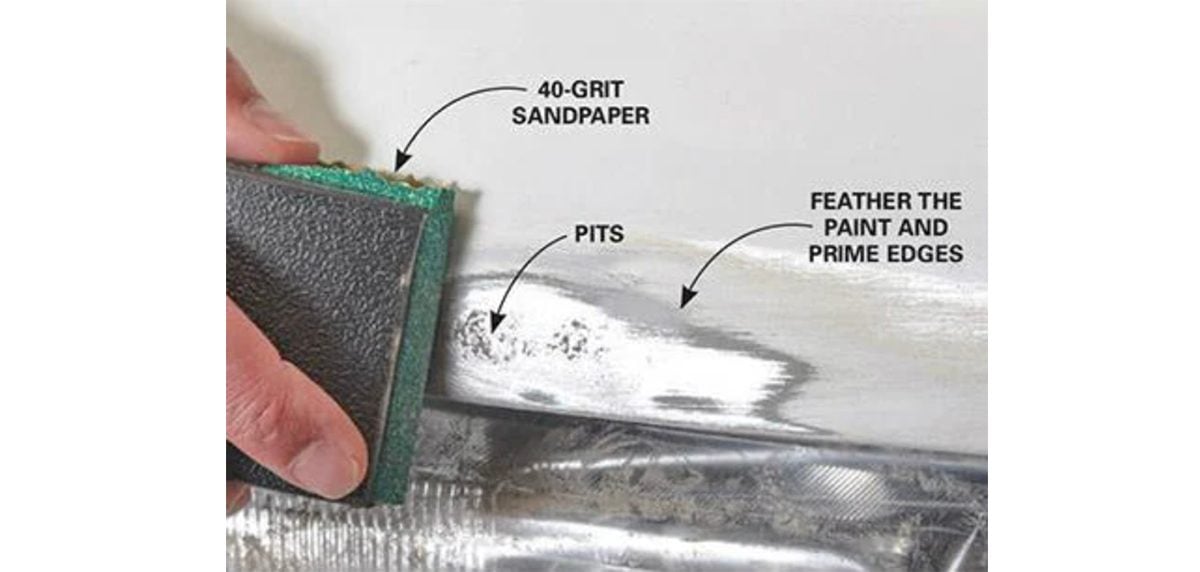
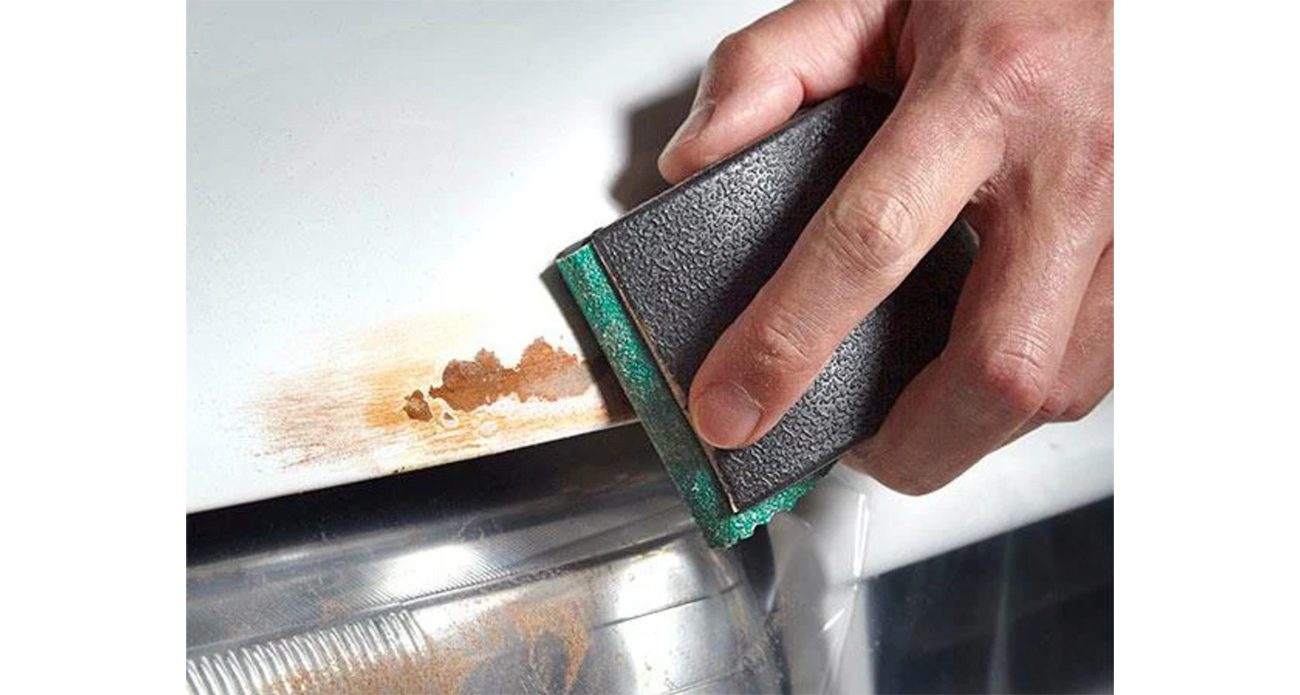
Footstep two: Remove the rust
Crack off any blistered paint with a scraper. Then sand the rust using forty-grit sandpaper, sanding through the rust spots, down to bare metal. So overstate the sanded area so y'all'll have infinite to plume the edges. And then feather the paint edges using 120-grit sandpaper. Complete the feathering with 220 dust. Use a tack rag to remove particles from the unmasked area. If the rust has created pits in the metal you lot can fill them at present with trunk filler or wait until the epoxy primer dries and employ multiple coats of filler primer.
Check out more than smart uses for sandpaper.
iv / 8
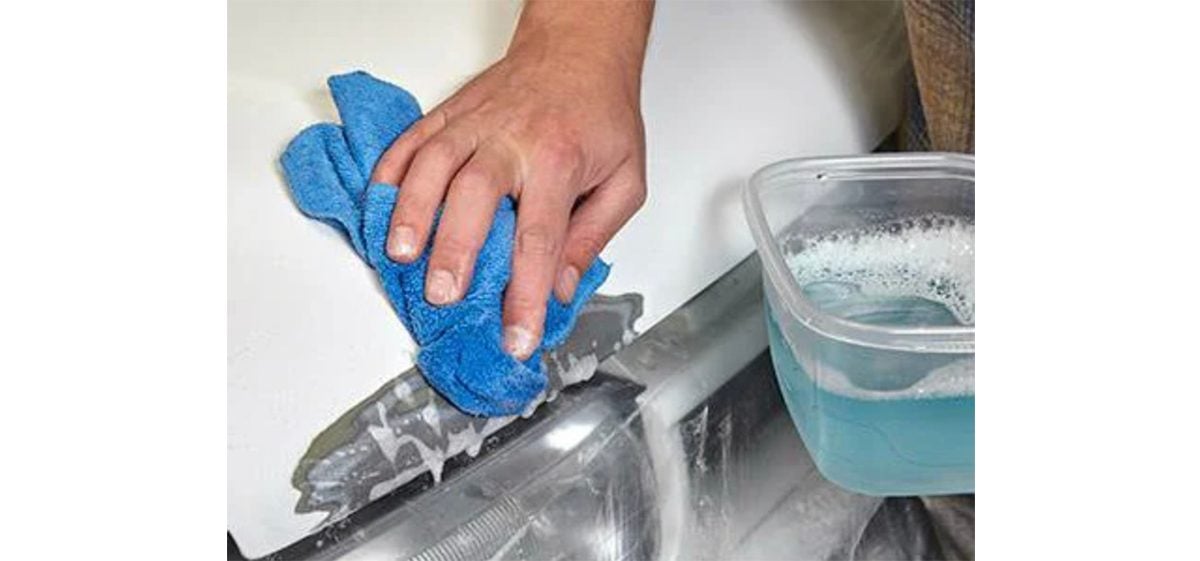
Pace iii: Make clean with detergent
Clean the unabridged unmasked area with a grease-cut dishwashing detergent, followed by make clean rinse water. Let it dry. Then wipe the surface area one more time with a lint-free material to remove any remaining dust or lint. Apply the paint manufacturer'south prep solvent.
Observe out 13 cleaning tricks professional car washers won't tell you.
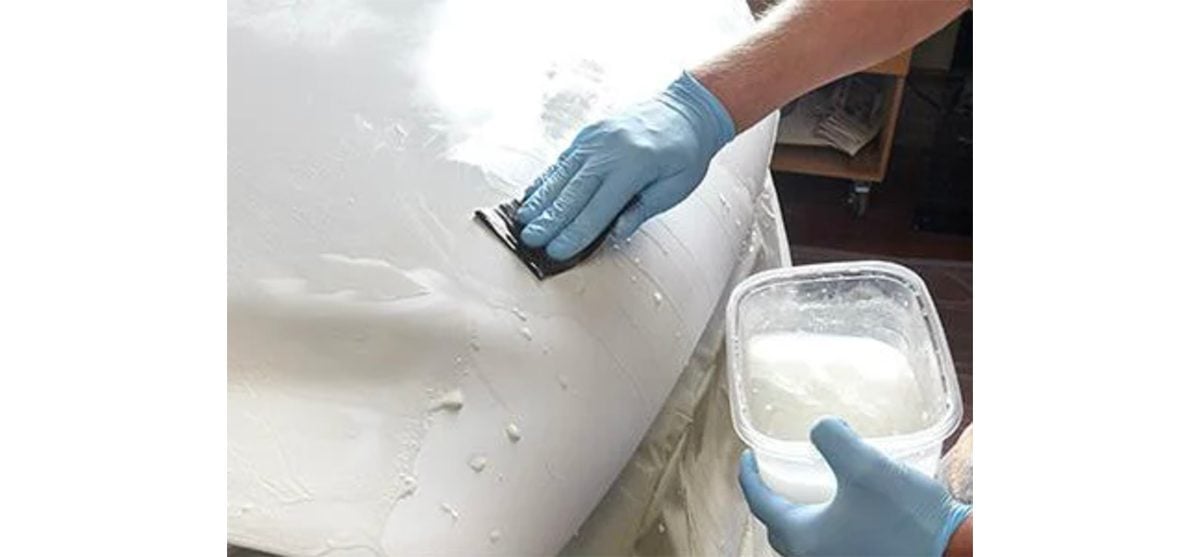
5 / 8
Step 4: Prime number the surface
Employ epoxy primer, then filler primer. Spray the filler primer in heavier coats to cover the entire repair surface area. Move the can away from the surface slightly and alloy information technology into the surrounding painted area. Self-carving epoxy primer provides a stiff bond to blank metallic, then use it as your kickoff coat. Spray two to three medium coats, allowing the recommended wait time listed on the characterization (normally 15 minutes) between coats. Look a total hr for the epoxy to dry to the touch (longer if it's boiling outside). Sand the epoxy primer with wet ane,000-dust sandpaper. Wash with clear water and let dry out. Wipe the dried epoxy primer with a lint-free textile and apply ii to 3 heavier coats of lacquer filler primer assuasive drying fourth dimension betwixt each coat. Let the lacquer primer dry until it'southward dry to the touch-at least ane 60 minutes-earlier sanding.
If your goal is to keep your machine in mint condition, avoid thesedriving and automobile maintenance mistakes at all costs.
6 / 8
Stride 5: Sand the primer
Sand drips and sags with 320-grit sandpaper. Then terminal-sand the entire repair area. Starting with wet 600-grit sandpaper, shine the primer and feather the edges. Then switch to wet 1,000-grit sandpaper to concluding-sand the entire repair, including the composite areas.
Can yous guess the virtually popular machine colour in Canada?
7 / 8
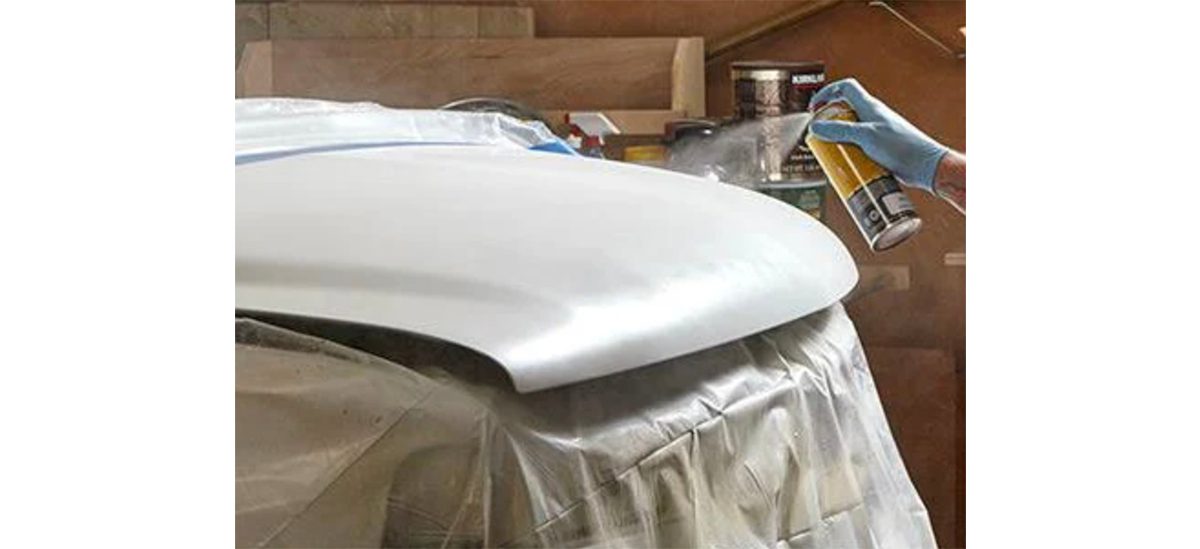
Step 6: Spray the base of operations glaze
Apply the coloured base coat. Start at the lesser of the repair and use the color glaze in left-to-right rows, overlapping each pass by about ane-third. Build the colour slowly into the repair and surrounding areas in two to three coats, assuasive well-nigh 10 to 15 minutes between coats. Holding the spray can about 12 inches away from the surface, spray the repaired area. The slower yous build the color coat, the better it'll await under the clear coat. Allow the base glaze to dry out, until it's dry to the touch, at to the lowest degree 60 minutes. Don't sand the base coat (especially metal colours) unless you've created sags. In that case, sand lightly and so respray the touched-up areas.
Has your auto suffered a scratch equally opposed to total-blown rust? Detect out how to repair machine pigment scratches here.
8 / 8
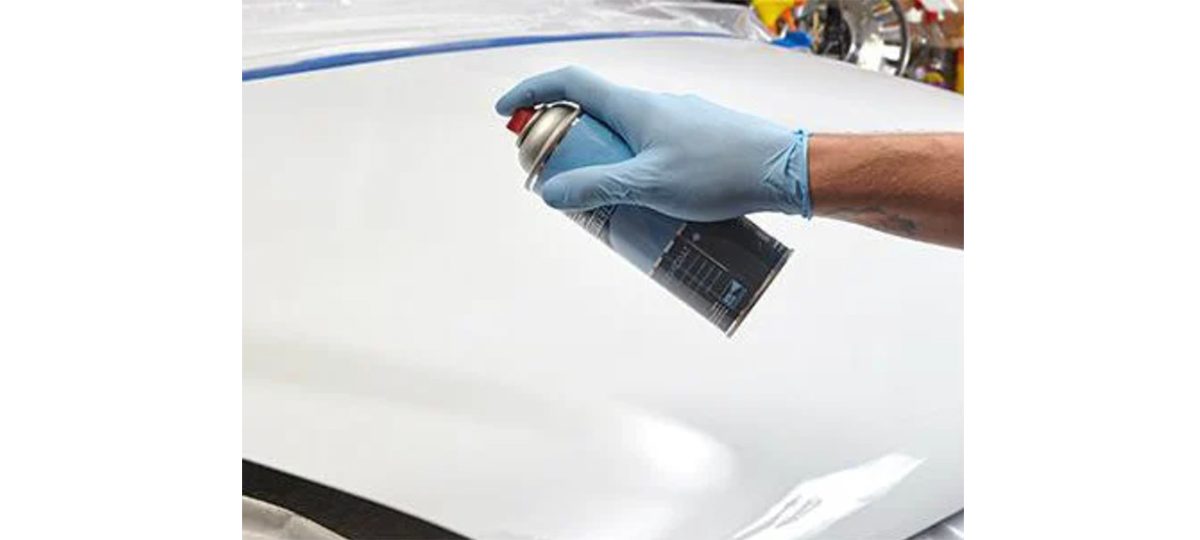
Stride 7: Spray on the clear coat
Utilize several coats of articulate glaze, assuasive the recommended drying fourth dimension betwixt coats. Gradually piece of work the clear coat into the surrounding painted areas to achieve a smooth blend line. This is the hardest part because all clear coats run easily and that volition ruin the look of your paint chore. If you lot create a run in the clear coat, you'll have to let information technology dry for at least 48 hours before attempting to fix it with fine-grit sandpaper and polishing compound. Then yous'll take to respray the sanded area. And then practice spraying on a scrap piece of cardboard to become a experience for the nozzle and the speed of application.
Using an old cotton T-shirt or microfibre textile and buffing compound, hand-vitrify the repaired surface area. Don't utilize a polishing machine for this step. Wait at least 30 days before waxing.
Now that you know how to fix rust on a car, find out which rust proofing option is right for y'all.
Originally Published: August xiii, 2021

threlkeldcolip1971.blogspot.com
Source: https://www.readersdigest.ca/cars/maintenance/how-fix-rust-your-car/
0 Response to "what grit is recommended to remove rust in your trunk of your car"
Post a Comment